Japanese Version
Linux Netatalk-HOWTO
Last updated: October 5, 1998by Anders Brownworth
Netatalk is a program which lets your Unix box look like an Appletalk fileserver on a LAN. This document is intended as a guide to help the Linux system administrator set up netatalk Appletalk services on a Linux box. Linux is a freely distributable POSIX compliant U*ix for 386, 486, Pentium, PowerMacintosh, Sun and DEC Alpha hardware as well as several other experimental platforms. (SGI, etc...) Netatalk is a program which exports a piece of the Unix filesystem via the appletalk protocol. Using Netatalk, Macintosh computers can mount Unix volumes as if they were standard Appletalk network drives.
Netatalk is brought to you by our friends at The Research Systems Unix Group, The University of Michigan. netatalk@umich.edu
Hugh Dixon is running the UK mirror of the Netatalk-HOWTO and Horie Seiichi is mantaining a Japanese version of this document.
I have started a Netatalk Counter which you should fill out after your setup is completed. With your help, we can get an idea of how Netatalk is being used. Note: this is for non-linux installs also!
Comments and corrections are very welcome. Someone had sent me a diff of my pages correcting my horrible spelling, and I proceeded to blow away my mailbox by mistake, so if you're out there, please resend that! I If you have problems, usually a good place to post them is to the appropriate Netatalk list.
Lately there has been quite a bit of talk about Redhat install issues. If you are installing under RedHat, take a look at the tips page and a note on the Other Topics section.
Want to know who's logged on a netatalk server? Try nu.
Before you begin:
What you need:
- You might want to look at some hardware / software suggestions.
- A section specific to netatalk on SparcLinux is available.
What you will do:
- Computer running Linux kernel 1.2.* or later installed with source and compilers
- An ethernet card with a driver capable of multicasting (most drivers out there do this but some drivers such as the Intel EtherExpress don't)
- LAN with a Mac (don't really need this but then, what's the point?)
- The Netatalk program.
- Source code for netatalk-1.3.3
- If you want to fool with the latest beta, it's netatalk-1.4b2.tar.gz (people are seeing twice the speed with far less CPU utilization with this beta)
- If you prefer, you can get the Netatalk binary RPM of netatalk+asun from RedHat and skip most of the setup discussed below.
- A patch to compile netatalk 1.4b2 under RedHat 5.0 is available.
- Get and decompress the netatalk source code.
- Follow the 1.2.* kernel guide if you are using a 1.2.* kernel. (2.* and later kernels need no modification)
- Follow the Netatalk-1.3.3 patch guide to fix a few bugs
- Configure netatalk source code.
- Compile netatalk.
- Install netatalk.
- Compile a kernel with appletalk services.
- Configure netatalk's options.
- Start up the server.
- Mount your new volume on the Mac.
- Look at some other topics of intrest.
(If you were wondering why I have you compile a kernel after you install netatalk, it's because kernel 1.2.* users patch that kernel's appletalk support during "install netatalk" with the kinstall rule which has since been taken out of the netatalk package as the kernel 1.3.* and higher appletalk implimentations don't need patching.)
Get and decompress the netatalk source code
- Get a copy of the latest source code. (you may be interested in a shoot-off distribution called netatalk-asun which supports AppleTalk IP among other newer features.)
- Put the source code where you want to unpack it
- Decompress the source code. Type:
gzip -d netatalk-1.3.3.tar.gz
- Unpack the distribution. Type:
tar -xvf netatalk-1.3.3.tar
Netatalk and Kernel Specific Setup
- Follow the 1.2.* kernel guide if you are using a 1.2.* kernel.
- Follow the Netatalk-1.3.3 patch guide to fix a few bugs.
Configure the netatalk source code
Note: If you want to build for the Andrew File System, there are things you need to do before continuing. Please refer to the README.AFS document in the source distribution.
- Set up paths. Edit your Makefile to reflect the install path and the man path. In Makefile, edit the line:
DESTDIR=/usr/local/atalkto reflect where you want netatalk to install all it's files. Edit the line:
MANDIR={DESTDIR}/manto reflect where you want netatalk to install it's man pages. I set my MANDIR like this:
MANDIR=/usr/local/atalk/man(it's really saying the same thing as before)
- If you have a system running shadow passwords (such as a RedHat system) you will need to add -DSHADOWPW to etc/afpd/Makefile.
Compile the netatalk program
- In your netatalk directory, type:
makeThis will make all netatalk binaries. Make sure you get through all of the compilation without a fatal error. Fatal errors mean things didn't compile for one reason or another. Don't just continue. Go back and try to figure out what went wrong.
Install the netatalk program
Note:
- In your netatalk directory, type:
make installThis will install netatalk in the DESTDIR which you set in the Makefile.
make installdoes not install the configuration files necessary to run netatalk.
Compile a kernel with appletalk services
Note: Many Linux distributions with a 2.0 kernel (such as Debian Linux) contain precompiled appletalk support, so you may not need to do this. Check your configuration with amake menuconfigfrom the/usr/src/linux/directory.Note: You need to have TCP/IP up and running also on the network card you plan to use for Appletalk because kernel Appletalk support doesn't contain all the framing code necessary to run Appletalk alone.You should really have experience compiling a kernel. If you don't, look through your Kernel-HOWTO docs. (usually at/usr/doc/faq/howto/Kernel-HOWTO.gzin Slackware Linux. Look at it with the command:zless /usr/doc/faq/howto/Kernel-HOWTO.gz)

- Goto your linux source root directory (usually
/usr/src/linux)
- Type
make config(ormake menuconfig, pick your poison..)
- Answer the questions corrosponding to your setup.
- Be sure to answer yes to
Configure AppleTalk DDP support? [n]- With older kernels (pre 1.3.*), you need IEEE802.2 support. Answer yes to
Configure
  IPX support [n]
as the IPX package includes IEEE802.2 interface support. (later 1.3.* kernel distributions do not require this as later 1.3.* kernel sources include IEEE802.2 support in their appletalk)
- Do a
make dep; make cleanto set up your source code for compile.
- Make a new kernel. If you haven't done this before, consult your Kernel-HOWTO docs. Kernels are made with differient commands depending on what result you want. (When I compile, I use the command
make
zImage
.)
Note:You can build appletalk support as a module if you like.- Copy your old kernel somewhere just incase the new kernel you just compiled decides to hate you and grind to a screaching halt!
- Install your new kernel and reboot your system on it. WARNING!! If you messed something up, your system will not come up! Consult your HOWTO docs for kernel installation.
Configure the options
Note: This document concerns itself with Appletalk file services. I do not go into the various print options. You will notice the print options commented out in the examples. Mike Pearson and Bill McGonigle have prepared a page on printing.
- Make yourself an
atalkd.conffile. In the netatalk source directory underetc/atalkdyou will find a file calledetc.atalkd.conf. Usually this file gets edited and copied to your netatalk DESTDIR/etc (/usr/local/atalk/etc) directory and renamedatalkd.conf. Instructions and examples on how to edit theatalkd.conffile are available.
- Make yourself an
AppleVolumes.defaultand anAppleVolumes.systemfile. These files tell the system which directories to offer as Appleshare volumes. In the netatalk source directory underetc/afpdyou will find two a files calledetc.AppleVolumes.defaultandetc.AppleVolumes.system. Usually these files get edited and copied to your netatalk DESTDIR/etc (/usr/local/atalk/etc) directory and renamedAppleVolumes.defaultandAppleVolumes.systemrespectively. Instructions and examples on how to edit these files are available.
- (if you were setting up the printing options, you would do so here.)
- Edit your
/etc/servicesfile to include the following Appletalk services:
rtmp 1/ddp # Routing Table Maintenance Protocolnbp 2/ddp # Name Binding Protocol
echo 4/ddp # AppleTalk Echo Protocol
zip 6/ddp # Zone Information Protocol
The
/etc/servicesfile tells your computer what service to use when network requests go in or out.If you are using NIS (network information system, or YP), don't add these lines to the services file. Add them to your NIS master machine's maps and push them.
- In your source distribution, edit your
rc.atalkscript to launch your Appletalk services. Here's what I use:
ATALKDIR="/usr/local/atalk"

echo 'Starting Appletalk fileserver...'

${ATALKDIR}/etc/atalkd
echo -n 'atalkd'

${ATALKDIR}/bin/nbprgstr -p 4 `hostname|sed 's/\..*$//'`:Workstation
${ATALKDIR}/bin/nbprgstr -p 4 `hostname|sed 's/\..*$//'`:netatalk
echo -n ' nbprgstr'

${ATALKDIR}/etc/afpd
echo ' afpd.'
Note: It is important not to launch any of these services in the background as their network data structures need time to stablize.
- Set Appletalk services to automagically start when the system is rebooted. In the source distribution directory, move the
rc.atalkfile to your/etc/rc.ddirectory and make it executable. (chmod 755 /etc/rc.d/rc.atalk) In your/etc/rc.ddirectory, edit the filerc.localto launch the rc.atalk script. Add the following line to yourrc.local:
/etc/rc.d/rc.atalk
- In order for someone to mount the volumes you have created on your Linux box, they need to have a valid shell account on the Linux system. AppleShare limits passwords to 8 characters, so you want to add users to your Linux system with 8 character or less passwords. A valid shell account means that somthing like /bin/sh or /bin/tcsh is at the end of that user's entry in the
/etc/passwdfile. If you just pipe to/dev/nullthe user will not be able to login. Root logins are prohibited by netatalk, and for good reason. Just don't!
Start up the server
Assuming everything has been installed and configured correctly, you should have no problem turning on Appletalk services.
- Fire up Appletalk server. In your
/etc/rc.ddirectory, run the scriptrc.atalk. Now sit back and wait a minute or so as the system checks out the network and sets itself up. Therc.atalkscript will normally be run at system boot time.
Mount your new volume on the Mac
Now we get to have some fun!
- Move over to a Macintosh connected to the ethernet.
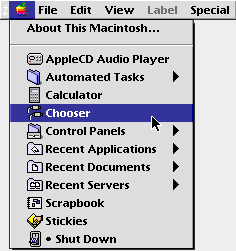
- Go to the Chooser from the Apple Menu.

- Click on the little hand holding a platter. (Appleshare services) Note: Appletalk must be active to do this. If it's not active, click the little button Active on Restart and restart the machine. If it still doesn't show up, the Mac may be listening to it's LocalTalk port rather than the EtherTalk port. To fix this, go to the Networks control pannel and click on EthetTalk, then try the Chooser again.
- Login to the Appleshare server using a valid username on your Unix system. If the Unix user you logged in as doesn't have permission to write in the exported directory, the Appleshare volume will mount as read-only. (this is granted this user has read privilages!) If you change directory permissions after a volume is mounted, you will have to throw away the volume and re-mount it for afpd to re-read the permissions. (afpd reads directory and file permissions every time the volume gets mounted)
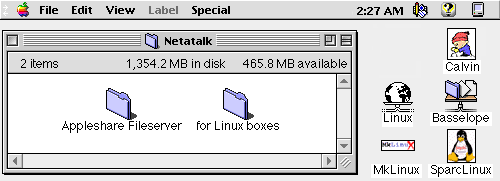
- You should see your Unix workstation in the window to the right. Double click it and it should give you the volumes you made available in your
AppleVolumes.systemandAppleVolumes.defaultfiles.
- Click on the volumes you want to mount. (Shift click will give you more than one)

- Click OK and smile with wide-eyed wonder as your Linux volumes are now available on your Macintosh! WooHoo!! (Homer Simpson inuendo)
- To unmount a mounted server, throw it in the trash. Don't worry, this won't delete the volume! (slight metaphoric inaccuracy on Apple's part ;)
Other stuff
- RedHat 5.0 users don't have to compile a kernel with appletalk support because it's already compiled in. However you may have difficulty compiling netatalk1.4b2 without the patched source or patch from Charles Barrasso. For the most part, it just adds several #include lines. Because RedHat can use shadow passwords, it also defines -DSHADOWPW in the Makefile. RedHat uses PAM (Pluggable Authentication Modules) which can handle shadow or standard passwords (as well as other schemes) when dealing with authentication. RedHat supplies a program used to switch a system to shadow passwords called
pwconvand a program to swith it back to standard passwords calledpwunconv. There are other RedHat 5.0 specific netatalk issues discussed on the tips page.
- I wrote a tiny perl script called nu that gives you a list of the users that have afpd processes up. To use it, download it from the above link, and save it. Do a
chmod +x nuto it so you can execute it. (requires perl) Let me know if you like it.
- If you are having problems, there is a tips page which I am posting for your browsing. These tips are from users like you who have overcome various problems the hard way so that you don't have to! I may not have had the same problems addressed in this page, so I can't vouch for it's integrity.
- Jay Schulist has a page on Localtalk with Linux, covering a driver he wrote called "Cops" and applicable hardware for connecting a Localtalk network and a Linux machine. There is a patch for 2.0.30 kernels and the driver is included in the 2.1.44 and greater kernels. There are also some notes on IP over Localtalk.
- Bill McGonigle is mantaining a Netatalk page with a great troubleshooting guide.
- Rob Newberry's Linux Services for Macintosh and Windows Users
- The Real Netatalk Homepage at the University of Michigan
- Windows print and file services for linux with Samba
- MkLinux: Linux for the PowerMac supporting netatalk 1.3.3
- SparcLinux, Linux on Sun Sparc hardware.
- Linux Ports from Yahoo.
- A listserv has been set up for announcements and general netatalk discussion. It's a low volume moderated list. You can subscribe by sending mail to netatalk-admins-request@umich.edu. Submissions should be sent to netatalk-admins@umich.edu.
- A Linux specific netatalk listserv is also available. Subscribe to it by sending mail to listserv@netspace.org with no subject and a body which reads SUBSCRIBE LINUX-ATALK (Your Full Name). To unsubscribe, send mail to the same place with the message text UNSUBSCRIBE LINUX-ATALK. Posts to this listserv should be sent to linux-atalk@netspace.org.
- A significant differience between the netatalk-1.3.3.b2 code and the netatalk-1.3.3 code is the 1.3.3 code does not include the kinstall option in it's make. Kinstall is used to patch appletalk support into the 1.2.* kernel. As of kernel 1.3.*, appletalk support is included in the kernel, so you don't need the beta. Older 1.3.* kernels have a "broken" implimentation of appletalk, so avoid 1.3.* kernels prior to 1.3.9.
- It has been discussed that there is possibly a multicast reading problem with the Intel EtherExpress driver for Linux which will make the netatalk server on that box not to show up in the chooser. It seems the option is commented out like so in the
eexpress.cfile:
set_multicast_list(struct device *dev, int num_addrs, void *addrs)There has been quite a bit of words on what "This doesn't work yet" is supposed to mean... ;)
{
/* This doesn't work yet */
#if 0
short ioaddr = dev->base_addr;
....
In general I have had awefull luck with my Intel EtherExpress cards. Personally I like to stick to a nice 3Com 509 card or somthing like that. 3Com's 59x PCI Vortex cards are the best for PCI based machines.
- Some people have expressed the want to use a differient icon for the netatalk volume. One way to do this is to do a "Get Info" on an icon you want to use. Next, select the icon in the Get Info window. (when it's highlighted, you should see a little black box around the icon) Do a Copy. Do a "Get Info" with the linux volume selected. Click on the "world-on-a-platter" icon, and do a Paste. Whalah!
- Sam Woolf passed allong a tip he found if the above method of changing a Netatalk server icon fails. He mentions a utility from Aladdin Systems called Rejuvenator that fixes corrupt server and folder icons.
- For Netatalk 1.3.3, support for shadowed passwords can be achieved by substituting this auth.c file for the origional one in etc/afpd. Re-compile your afpd binary with the -DSHADOW_PASSWORD option to build an afpd with shadow password support. To do this, edit etc/afpd/Makefile and add -DSHADOW_PASSWORD to the list of CFLAGS. The netatalk 1.4b2 package doesn't need the patch. Just compile with -DSHADOWPW.
- An interesting point: Paul Hargrove has written hfs for linux. To put it in a nut-shell, he made it so you can mount and have read and limited write access to macintosh volumes on your Linux box. I am using it to make Macintosh CD-ROMS mounted on my Linux box via hfs, available through netatalk to my Macintosh users. Give it a try if you are up for it. I've had good luck with it. To use hfs with netatalk, you want to mount a disc with the fork=netatalk option. (ie:
mount -t hfs -o fork=netatalk /dev/your_cd /where_you_want_it_mounted)
- On my linux / netatalk box, I also run a program called samba. If you are not familiar with it, samba enables file and print services for Windows users from Linux. (or any Unix for that matter) I serve CD-ROMS, writeable volumes, and print services to Windows and Macintosh users with samba, hfs and netatalk all on one Linux system. (not to mention the web servers, proxy server, mail and news which are also run from this little Dell 486 DX2/66! It's the Library machine for The Stony Brook School)
- If you want to change the name of a server as it appears in the chooser, call afpd with the -n option. I like to have the server name capitalized, so I call afpd like this:
making Eyore show up as the server name instead of the (all lowercase) hostname eyore.afpd -n "Eyore"
- Werner Eugster has prepared a printing HOWTO and Mike Pearson and Bill McGonigle have written a printing page covering the printing issues which I have so skillfully avoided in these pages! ;)
- Linux has been ported to the PowerMac by Apple and OSF-RI. The result of their work is called MkLinux. I'm writing this on a Radius 81/110 PowerMac colone running MkLinux! However, the most interesting thing is that netatalk-1.3.3 has been ported to MkLinux by Michel Pollet so your Mac running Linux can still run as an AppleShare fileserver!
MkLinux runs on the Mach 3.0 microkernel, so what I would love to see would be a port of the MacOS which would either run as a Linux process, or just another OS on the Mach kernel! I have two monitors on my PowerMac. MacOS could run on one screen with X on the other. Move your mouse from X over to MacOS on the same box. The perfect developer's environment!
- Interested in what this page really looks like in Japanese?
- Just incase anyone hadn't noticed, I name my computers after cartoon characters. (hence the names in the examples above) For those of you who have asked for an explanation, other than the obvious Calvin from Calvin and Hobbes, Thak is the name of the cavemen with the big body and tiny head commonly appearing in Gary Larson's The Far Side.
I'm looking for a job, so if you can help, it would be greatly appreciated.
If this little guide has been helpfull with your installation, please drop me a note stating so. I'd like to find out if all the work I've put into this project has helped anyone out. If you wish to thank me, you may do so best by asking around to see if there are any old Silicon Graphics workstations that are unused. I would be very interested in removing them as I'm fostering a collection of antiquities. ;) Thanks!